Checking a trike’s tracking.
Material Required:
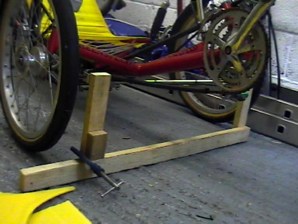
1 tremmel (1 length of 2x1 timber the width of the trike, 2 uprights higher than axle height, a ‘G’ clamp and 2 ‘stops’ or pointers).
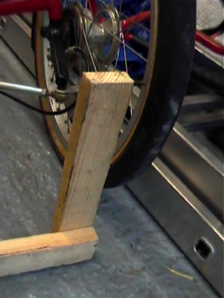
Attach the fixed upright to the main member and attach one of the pointers to the top of the upright as per pictures.
Attach the remaining pointer to the other upright.
Attach the 2nd upright to the main member using the ‘G’ clamp so that it can be adjusted.
Material Required:
1 tremmel (1 length of 2x1 timber the width of the trike, 2 uprights higher than axle height, a ‘G’ clamp and 2 ‘stops’ or pointers).
Attach the fixed upright to the main member and attach one of the pointers to the top of the upright as per pictures.
Attach the remaining pointer to the other upright.
Attach the 2nd upright to the main member using the ‘G’ clamp so that it can be adjusted.
To use:
1) Place the left (fixed) stop of the tremmel against one rim.
1) Place the left (fixed) stop of the tremmel against one rim.
2) Place the right (moving) stop against the opposite rim
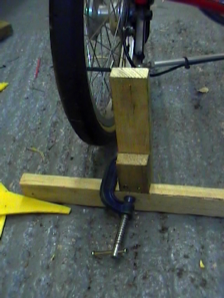
3) Tighten the ‘G’ clamp to record the measurement
4) Remove the tremmel and place the device with the fixed stop against the rim at the rear of one of the front wheels
5) The gap between the moving stop and the rim is the amount of toe in.
Notes for more accurate results:
1) Better results will be obtained if the rear of the wheels are drawn together using shockcord - this simulates riding conditions.
2) Better results may be obtained with the rider on the machine whilst measurements are being taken. This may require a helper.
3) To be really accurate it may be better to mark the position of the measurement on each rim using a wax pencil and rotate the wheels so that the rear measurement is taken from the same spot on the rim. This will eliminate errors due to out-of-true wheels.
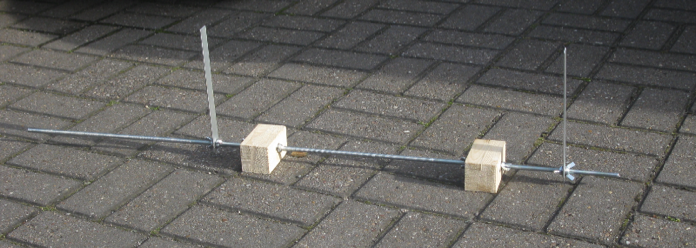
Below is the latest incarnation of the tremmel, made from a length of M8 threaded rod, eye bolts to hold the feet (scrap timber) and the pointers (flat aluminium strip). This is much easier to adjust and use than the version above.